Importing Records into Tessera
Because artwork records rely on data from the people component it’s recommended you import, or enter, people records before you import Artwork data.
Tessera allows users to move their existing data into Tessera with ease. It’s likely this isn’t something you’ll do often so it’s worth taking time and getting it right. Most often you’ll be importing data from an Excel spreadsheet but there may be other file formats that hold your data.
For a full range of file formats supported see the FileMaker Pro support page on this topic.
Ensure the data for import is as accurate as possible. It’s much easier to spend the time ensuring the information you’re going to import is as you want it while it’s still in it’s original location. Spend time familiarising yourself with what can be imported and how it should be imported.
Importing and committing artworks into Tessera
Importing data into Tessera is a two step process. The initial import places the records into a temporary file allowing you to make adjustments, or even cancel the import. Once you’re happy with the data you then commit the data which only then moves your records into Tessera.
Importing People
Pre-formated Excel spreadsheet
We’ve pre-formatted an Excel spreadsheet with the correctly named columns to help you with the import of people into Tessera. Move your data into this spreadsheet or alter your existing spreadsheet so the column names are the same as the one available to download to help the import process.

Download the pre-formated Excel Worksheet for importing people here.
Import Fields
Mr Mrs etc
First Name
Last Name
Partner (The name of the person’s partner)
Company
Street
Office (1st line of address if required)
State
Suburb
Postcode Zipcode
Country
Title | Director CEO etc|
Telephone Home
Telephone Work
Telephone Cell Mobile
Fax Number
General Comments
Extra 01
Extra 02
Extra 03
Extra 04
Extra 05
Tips on preparing data for import
Ensure the data you import isn’t unnecessarily padded with spaces or unwanted characters.
Import is a two step process and you will have the opportunity to check the data before committing it to Tessera.
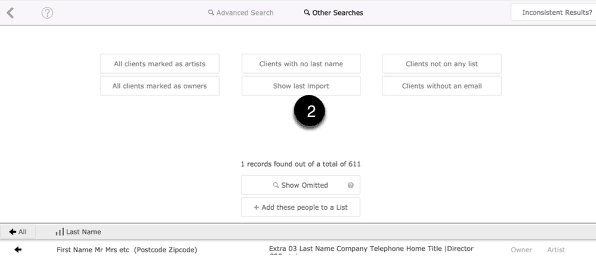
Once the data is imported you can always find the last imported clients at any time by using the search function where a button specifically designed to find these can be found.
How to manage names in one column of a spreadsheet
You may well have the complete person’s name in one column of your spreadsheet yet you need to divide the first name from the last name and have them appear in columns of their own to import them into Tessera.
Turn one column of data into two with Excel
Open the spreadsheet containing the column of data that you want to split.
Click the column heading at the top of the spreadsheet so that the column with the data to be split is highlighted.
Find the Text to Columns feature available in one of the Excel menus. (Search for “Text to Columns” in the Help menu if you can’t find it).
Click the Delimited option as there will be an empty space separating the first and last name.
Choose the character that you want to set as the split, then click the Next button.
Choose the data format for each of the columns, then click the Finish button to split your column.
For names with more than two entries you will need to make manual adjustments.
Importing People
- Access the Tessera Screen

Use the Import button (1) and select Import into People (2)
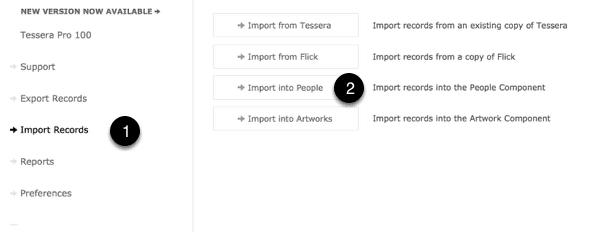
The Import Screen
- Use the Import Resources button to view the fields you can import and for the option to download a reformatted spreadsheet.
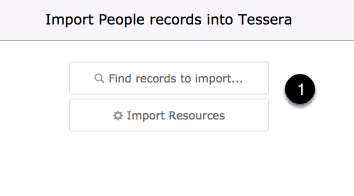
Finding the data to import
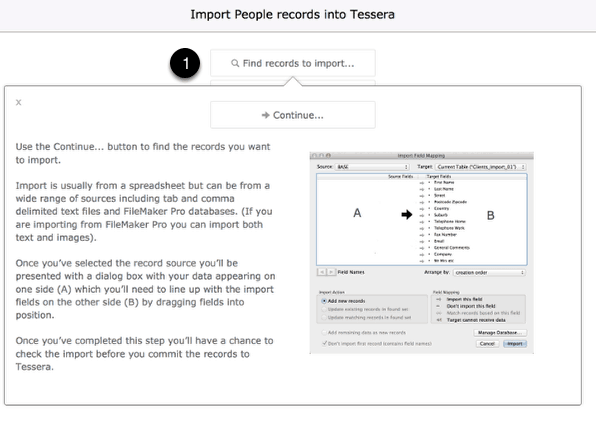
Use the Find records to import… button and read the text now visible to get a clear understanding of how you’ll be matching the fields available with the data in your spreadsheet.
Matching Import Fields
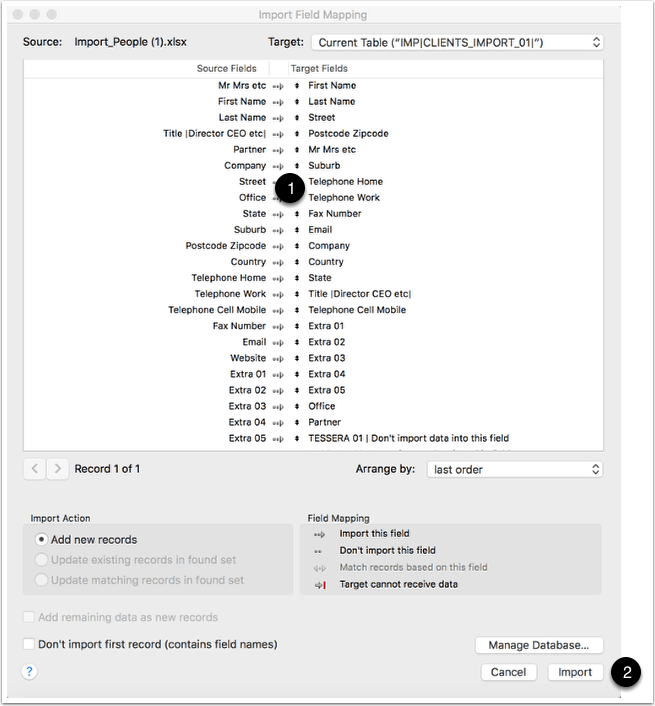
Once you’ve selected the spreadsheet this is the dialog box you’l be presented with.
- Take time to match the import fields. You’ll need to drag the fields so that they align with their counter-part.
- Use the Import Button to compete the import.
Check Import
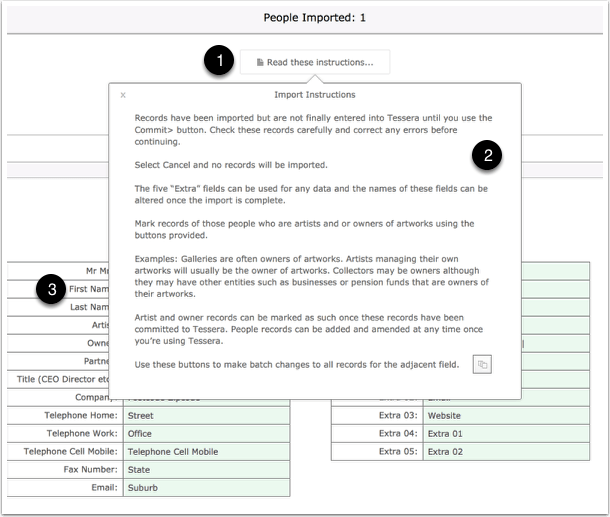
- Once imported use the Read these Instructions… button to familiarise yourself with the features available.
- In particular learn how the Batch button works. If you were to import 100 records all of which are artists then rather than having to check each record in turn you can simply check one record then use the Batch button to mark the other 99 records in the same way. (You can amend entries once they’ve been imported into Tessera but the Batch button is only available on this screen).
- The Batch button is available for adjusting both Owner and Artist records.
 Committing records to Tessera
- Once you’re happy with the formatting of your data use the Commit > button to move the records into Tessera.

Making corrections
What happens when you commit 1,000s of records to Tessera and then discover there’s an error in every record? Use the People advanced search feature to find all of the last imported records then use the Delete > More feature to delete them in one step.
(Note if you have already started attaching some of the imported artists or owners to artworks then you’ll have to undo these alterations before being able to delete the records in one pass).
- You can find the last records imported by using the button under the People advanced search screen.
- Select this button to show all the recently imported records.
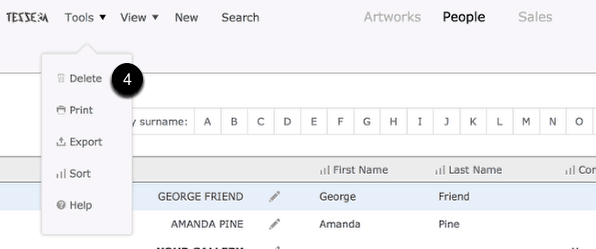
- Now that you’re viewing these records use the Tools button
- Now select to delete all of the records being browsed.

